This post is a response to a query from my friend Belinda. She asked how to get good gig/concert photos after seeing some I took at an event we both went to. So here is my beginner's beginners' guide to getting photos at a rock gig.

Now there are many excellent guides to shooting at a gig, and probably a lot more useful, however, as an amateur photographer I thought it might be useful to explain how I approach these shoots.
Before you get into the nitty gritty a quick spoiler: Wide aperture, high ISO, steady hand, fastest shutter speed you can get away with.
Sucking in the light
Gigs are generally low light affairs. So you need to get as much of that light onto your camera sensor (or film if you are that way inclined) as possible. Use a fast Lens: Buy, beg, borrow the fastest lens you can. I use two lenses that stop to f2.8. One is a short zoom, and one is a prime. You can use a slower lens, but the bigger aperture you can get will give you a little leeway with other settings that I will mention shortly. Now the rub is that generally the bigger the aperture, the bigger the price, especially with the zoom lenses. If you want to forego the zoom, Canon users can get a f1.8 50mm lens for a relatively low price, and I'm sure the other systems will have similar. Sure you might have to move around more to get the framing right, but hey, that's fun right? The other thing to remember is that the bigger the aperture, the smaller the depth of field. (Depth of field is the amount of the subject that is in focus in front and behind the bit you are actually focussing on. It's all to do with light, and optics, look it up on google for a better explanation). The con here are that if you want to get the musicians face sharp your focussing has got to be pretty spot on. The pro is that you can very easily throw the background out of focus, creating nice separation from the main subject.
Make the sensor work for you: Play with the ISO setting. The ISO setting basically sets how sensitive the sensor will be to light. A smaller ISO will need a more light to capture an image than a big ISO.
However there is a trade off here. If you use a higher ISO setting you can capture images in lower light, but the quality of that image will be more grainy. This is a double edges sword. Yes, the images will appear grainy, however, this can be a great effect for this subject. Think back to those great grainy imaged in Sounds and The NME in the eighties, superb.
Grabbing the action
Two things to think about here. Focussing and shutter speed. Focussing can be pretty tricky in low light venues, especially if your eyes are on the wrong side of middle age like mine. Some people swear by manual focussing, but I rarely do as both my eyesight, and my reflexes are not up to it. So it's autofocus for me pretty much all the time. Depending on your lens, you might be able to override the autofocus without having to flip that little switch on the side of your lens barrel. This can be handy especially if your lens has to hunt around for focus in low light. Now autofocus is a funny old beast sometimes, it can be great for static subjects, like the drummer for instance (when I say static, I mean not running around, wasn't meaning to imply drummers don't move), however if you have an enthusiastic singer, or a frenetic guitarist, the standard auto focus can struggle a little. On Canon there is a few modes to try, and one is AI Servo (sorry I don't know what the equivalent on other systems is called). This is how it works. Focus on the subject, but keep the focus button (more about this soon) depressed. The camera will try to keep in focus whatever is on the focus point. So in theory if you keep the focus point on a moving singers face, it should stay in focus while you are tracking them. When the perfect shot appears, take the photo. Here’s a tip. There is an amazing function invented called back button focussing (well that's what lots of people call it, it has a proper posh photography term which I forget). This allows you to, on a lot of DSLR's, remove the focussing function away from the shutter release button, and to reassign it to a button on the rear of the camera. Why would you do such a crazy thing? I hear you cry. Well this allows your shutter finger to be dedicated to just one task. Taking the image. It doesn't want to have to worry about having to half depress to focus, it just want to, BAM, get that picture! Moving the focussing to the rear of the camera body allows your thumb to get in on the action. Millions of years evolving opposable thumbs comes to the fore. You can dedicate your thumb to keeping your subject in focus!!
Enough about focussing, lets cover the shutter. If you want to freeze the action, you need a higher shutter speed. If you want some motion blur, you need a lower shutter speed. Simple right? Well let me tell you, our friend the low light venue, is not going to let you get it all you own way. Even with a fast lens and high ISO setting, you might not be able to get the high shutter speeds you want. Have you noticed there's a lot of compromise in gig photography? So when you are forced to shoot at 1/30 at 55mm what can you do to help your chances. One great thing to practice if the way you hold the camera, and your stance. Keeping as still as possible will vastly increase you chance of freezing those spandex clad poses. Try not to breathe to heavily, or at all if possible, whilst you depress the shutter release.
Other Stuff
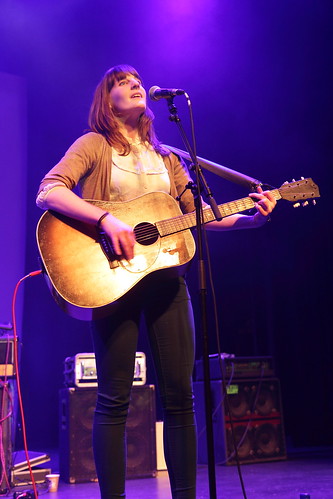
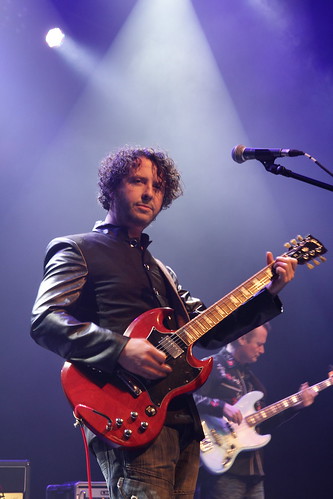
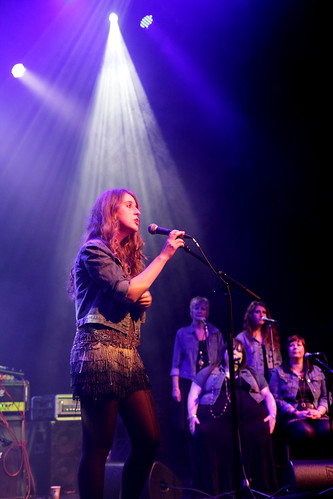
Have fun with this, what's the point otherwise (unless of course you are getting big bucks for it, then of course be as miserable as you like). Get different angles if the venue is suited to it. If the stage is low, get on your knees to get striking shots (wear old jeans, there's beer and all sorts down there). Try getting a range of shots of the band, as individuals, guitarists posing together, wide shots of the whole band. I always try to get some of the drummer as they are often the most difficult to shoot. They are usually relegated to the back of the stage, and are hidden behind cymbals, stands etc. While we're on that subject its amazing how microphones, and stands are invisible on the night but miraculously appear in front of peoples faces when you get back to your computer.
Quick note a about flash. Some places don't allow it. I really only use it to shoot things not lit up, for example crowd shots, or odd abstract images around the venue. If the venue do allow it flash can be effective sometimes on the band, but not too much.
Try not to chimp too much, i.e once you have your exposure ok, try to resist checking your screen too much.

Try to talk to the band after the gig to let them know if and where they can get hold of the photos. Facebook, and twitter are good ways of tracking them down if you miss them at the gig.
Well that's far too many words for one sitting. One final thing, be safe. Insure your equipment, wear earplugs, and try not to be too flashy about your equipment. Nobody want to get clunked on the back of the head walking back to the train station on the way home.